How Can We Help?
Adding & Editing Bookings
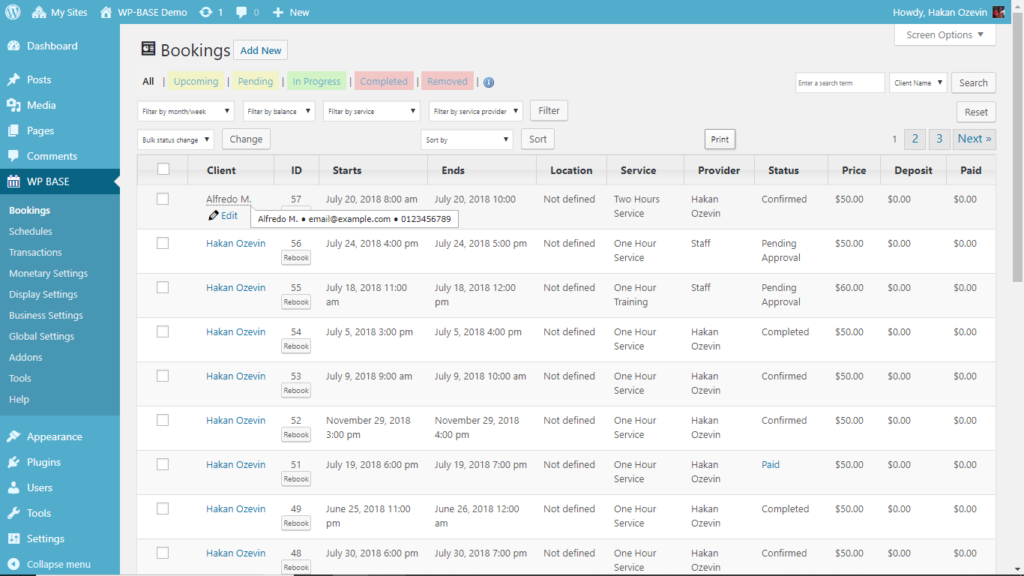
Normally bookings are made by clients on front end, but admin can also add bookings directly on WordPress admin side (Manual Booking). This is quite useful if you are accepting appointments by phone or email. There are several methods to add a new booking:
- Add New button on Bookings Page: When you click this button, an empty record will be opened with first available time for first service pre-selected.
- Rebook button: On each booking record, there is a Rebook button. When you click this button, an empty record with client, service the same as clicked booking and first available time pre-selected.
- Schedules page: On schedules page in weekly and 4 weeks tab, when you click on a free time slot, you will be redirected to bookings page, an empty record with clicked time slot pre-selected.
- Admin dashboard: On admin dashboard, when you click Add New Booking button, you will be redirected to bookings page, an empty record with first available time for first service pre-selected.
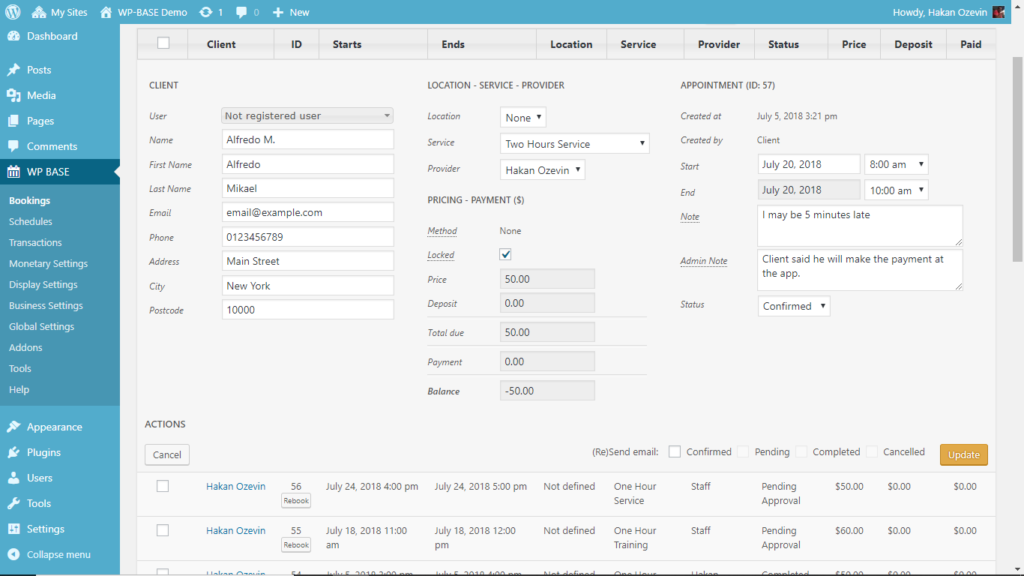
To complete a new booking record or edit an existing one proceed as follows:
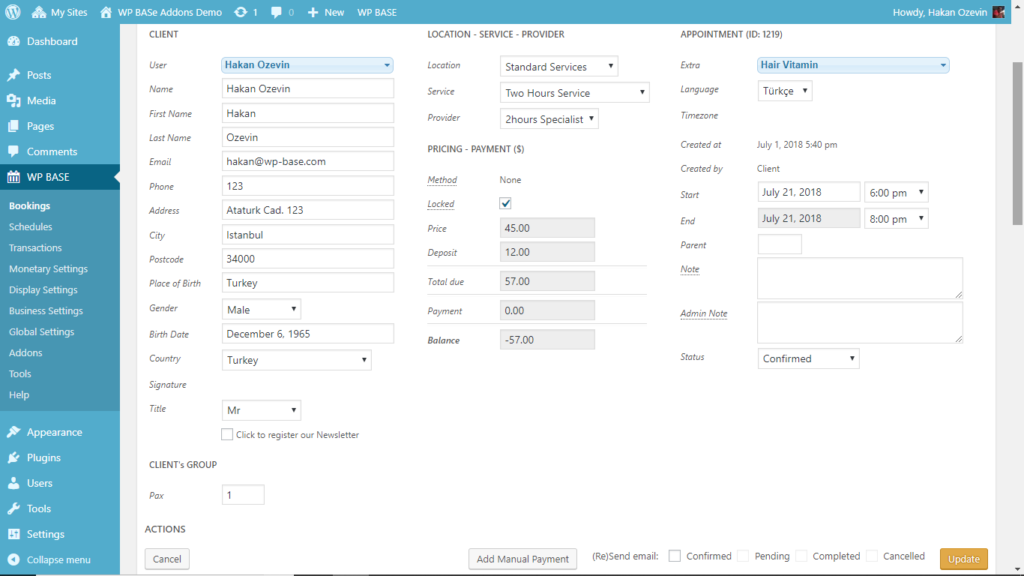
- Select the client: If client is an existing user of your website, select him/her from User field. Filter feature of the user selection menu may be useful to find the client. As you select the client, his/her saved data will be automatically used to fill the user fields. If client is not a WordPress user, leave User field as “Not registered user”.
- Complete or Edit client data: You can edit pre-populated user data or enter new values. Please note that values you entered here is for current booking only and it will not affect user data of the client. For example, if you change email field, that email will only be used for this booking, e.g. to send confirmation. Your client will continue to use their original email as it was before.
- Select Service: From the Service pull down menu, select the desired Service. Price and deposit fields will change on-the-fly, if a value has been set for the service.
- Adjust Price if required: The price field automatically takes service price. If you want to set a custom price, you can enter your price provided that Locked check box is cleared. Locked check box is used to prevent unintentional price change as service and other parameters change.
- Set booking date/time: Using Start field, set desired date and time. End field will automatically match according to duration of the service.
- You can enter your notes in Admin Note field. This field is by no way visible to client and it cannot be included in emails to maintain privacy.
- Set Status as you wish. If you do not expect any further action from the client, confirmed is the correct status.
- If you want to send email to the client as a confirmation check the box in (Re)Send email field. Only the box that is matching the status can be checked and it makes corresponding email template to be sent. For example, when pending is selected as status, only pending check box can be checked and Pending email template will be used.